There are many tips for camouflaging sealant. One easy way is to use a clear sealant. A clear sealant can be exceptional for those wanting to create a sleek, refined look that will seamlessly blend in but do not want the trouble of matching colors.
Buying Tips: Things to Look For
Here are a few tips to be aware of in your selection of the right transparent sealant for your project.
1. Superior Clarity
One of the things to be on the lookout for is a transparent sealant that will dry ultra-clear. Although some products claim “clarity,” the clear transparency may begin to yellow or start cracking within just a few weeks. This is why one needs to look for a product that includes thermoplastic rubber base polymers and mid/end block modifiers; these chemicals will result in excellent clarity for years to come.
2. Tenacious Adhesion & Flexibility
In your research, see if the sealant works well in bonding with a variety of materials and surfaces. Although some silicone products are called adhesives, their bonding may be considered much weaker in comparison to other sealants. If the sealant can adhere to substrates such as brick, glazed ceramic tile, concrete, glass, stainless steel, and a variety of other materials it has been created with excellent chemical compounds.
3. Versatility
A good question to ask is, can this product be used in the interior and exterior of your home or location? Some sealants are meant for only one specific area of use, so make sure you have a product that will align for both. Although many sealants can be used on a clean, dry surface, it is more versatile when it can be used on wet surfaces as well. Also, see if this product can be used below grade such as in a basement
Tip: Sealants that are adaptable to both indoor and outdoor use, give two forms of energy savings.
The Product We Recommend
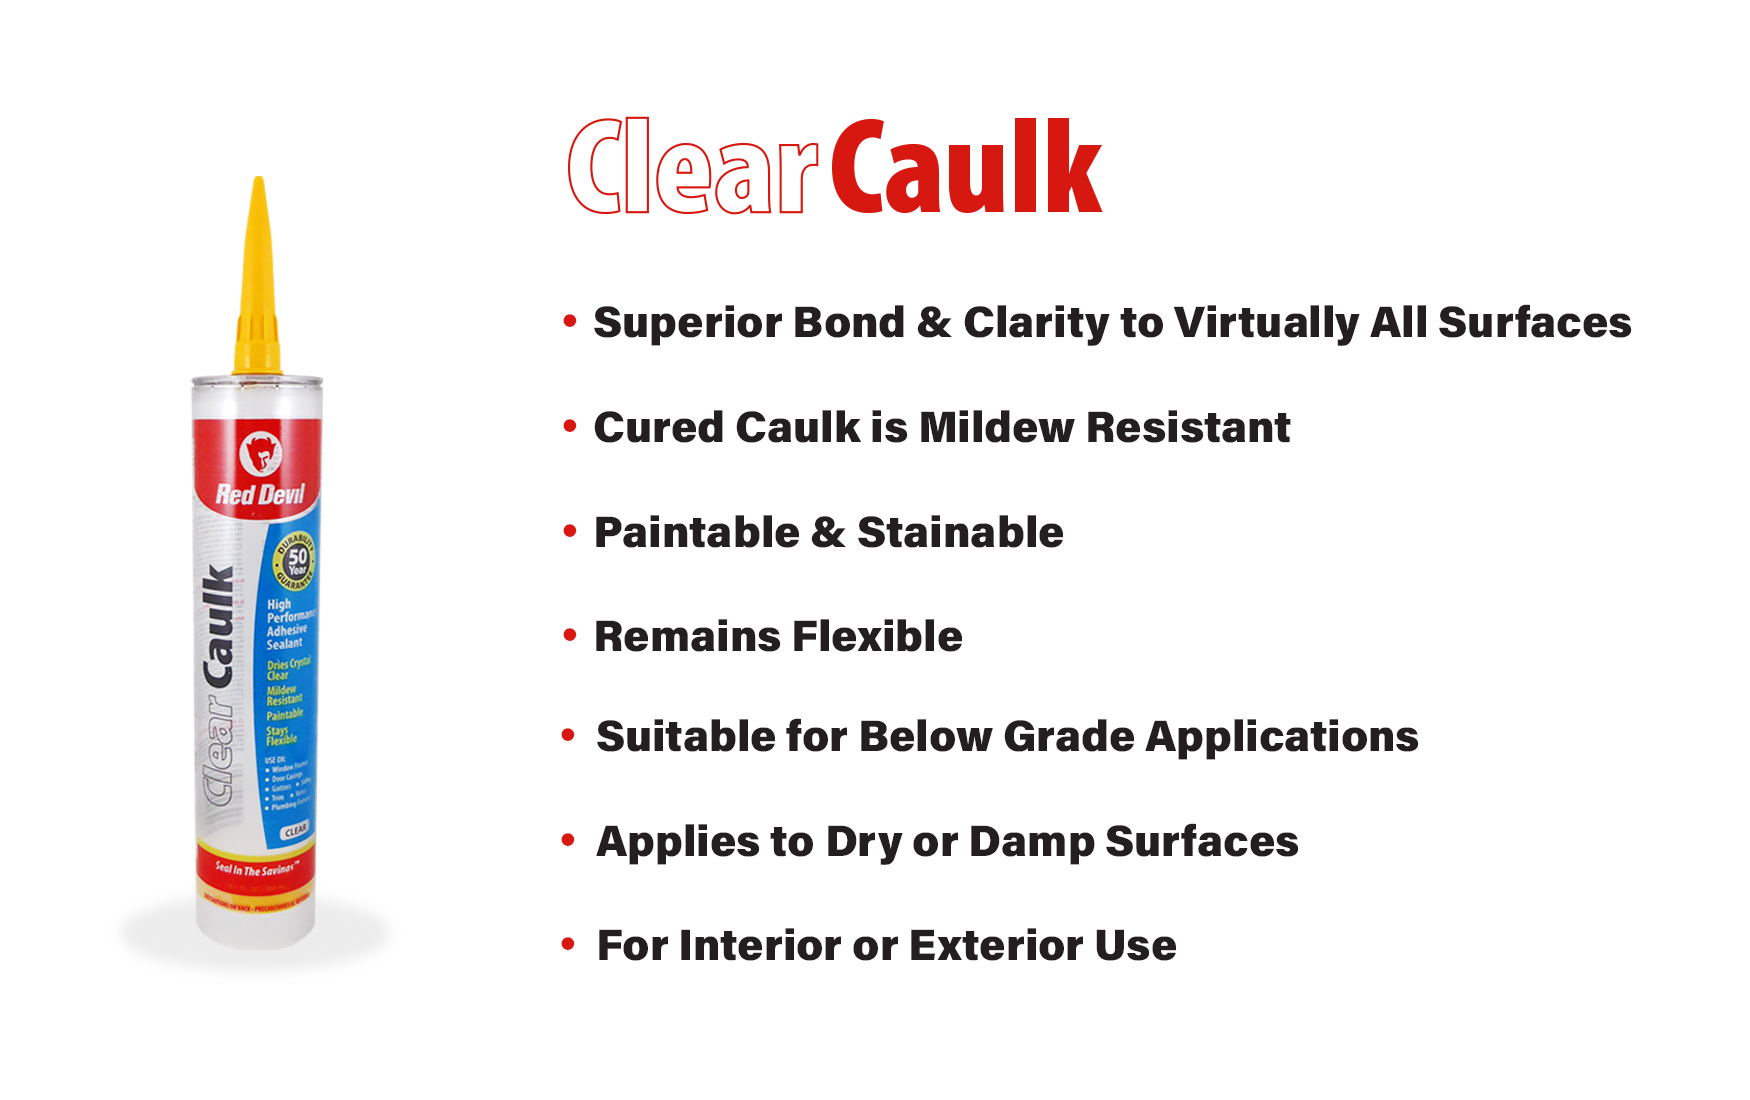
We think there is no transparent sealant better than our Clear Caulk product. This caulk has been formulated to bond with virtually every surface as an adhesive, while staying crystal clear, flexible and mildew resistant after curing. There are various caulks that are offered in clear, but many are made to work on a limited surfaces and do not come with adhesive bonding strength, yet Clear Caulk offers that and more. This caulk can also be painted or stained.
How-To: Projects That Can Be Done
Clear sealants can be used in various projects around the house or worksite. To know where your preferred caulk can be applied take a look at the projects it’s recommended for. We’ve used our Clear Caulk in the below ways.
-
- Sealing Window & Door Frames
- Sealing Siding, Trim, Vents & Pipes
- Sealing Gutters & Downspouts
- Air Conditioners
- Sealing Skylights & Plumbing Fixtures
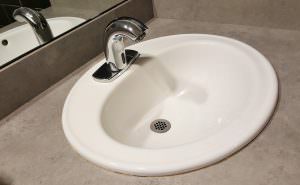
Application Project:Sealing Around the Sink
Tools
Clear Caulk (10.1 Fl. Oz) Small Utility Blade Painters Tape Caulk Gun (Your choice) Caulk Smoothing Tool
First, use a small blade or utility knife (such as our Tuf-Kut™ Auto Load Utility Knife) to help trim away the old sealant that may be cracked, or have mold or mildew built up. Gently slide the blade underneath the sealant, and the old layer of mold should begin rolling up, yet the bottom part of the original sealant may remain. Keep scraping until all the old sealant is removed, and it is clear to move ahead to applying new sealant. This process can be very time-consuming and can become very irritating because of the “slow-go” process.
Tip: After removing the old sealant, now may be the time to use water and vinegar or alcohol to clean around the sink’s surface.

Taping It Up
Next, having removed the old sealant, one step often overlooked is applying painter’s tape. Although some choose to go at the job of sealing without tape, it is truly a valuable tool to yield professional results. Generally, the tape is laid down with several pieces on the bottom and the top of the sink, leaving enough room to seal between the two. One can lay the tape down in various ways and angles; however, the main thing is to keep a small gap between the tape and counter where the sealant will go.
However, right before we start, there are a few more steps we need to take.
Kutting the Tip
- 1. The utility knife that we used to clear the old caulk can be used again to cut the tip edge of the sealant cartridge. This step seems small and non-consequential; however, the angle determines how the caulk will come out. If you look at most caulk cartridges, they have transparent cursor numbers at the top of the tip, and these can help guide you. We want to clip the off tip of the spout at 1/8 mark with a 45° angle. Tip: A good rule of thumb is to clip the cartridge tip at the 1/8 mark with about a 45° angle.
What Caulk Gun Do I Choose?
- Next, choose a caulk gun. We will not go into the large variety of guns and their differences; however, here are a few tips on selecting a caulk gun. First, if you’re a DIYer or a “newbie,” a No-Drip or Drip-Free™ Caulk Gun would probably be best (we also highly recommend our Extreme Duty Caulk Gun for small jobs and future uses), this helps complete a project with no mess or lost material. Yet, the Clear Caulk cartridge can be used with any standard caulk gun.
Ready, Set, Caulk
Finally, we come to the action part; start applying a fresh coat of new caulk around the sink base using the edge as a runner. Although this can take only a few minutes for some, it may take much longer for others; every person is diverse and works at a different pace. After finishing, smooth it around with a caulk smoother tool or the simplest tool, your finger. If using your finger, dip it in a little bit of water before applying, it will give the caulk a smoother look. This helps open the caulk from just a small bead to a full spread that fits the crevasse much better.
Clean Up
Begin by removing the pieces of tape around the sides of your sink. Taking the tape off while the caulk is still wet assures that you will not rip the caulk up as well if you wait till it’s dry. Then let it sit for at least 72 hours until dry; some even recommend not using the sink for at least three days.
Our Guarantee
Our Clear Caulk features superior clarity and remains flexible as well as paintable. This product also features a 50 Year Durability Guarantee
for your satisfaction.
To learn more about our Clear Caulk visit https://www.reddevil.com/products/product/kitchen-bath-siliconized-acrylic-sealant.