So you just got a brand spanking new apartment and you are all excited to paint your walls the color that best expresses you. Then you spot some tiny wall buzz-killers called thumb tack holes and all seems lost. These nearly microscopic holes occur when thumbtacks or small push pins are used to hang pictures or posters. Fortunately, these types of holes can be easily repaired and blended into the surrounding wall so you can paint with confidence. All you need is a finger, some lightweight spackling, and a damp rag!
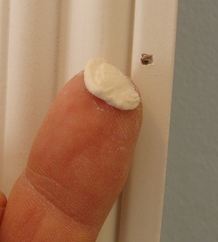
Step One
Using your finger, apply and press an appropriate amount of spackle into the thumb tack hole.
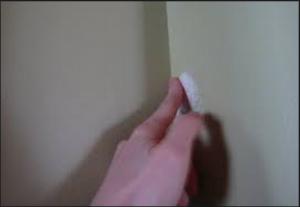
Step Two
Using the same finger, smooth out the surface of the spackle so that it blends in with the texture of the wall. This can also be done using a 4-6 inch putty knife.
Step Three
Clean up any excess spackling surrounding the thumb tack hole with a warm, damp rag.

Step Four
Repeat as needed for all thumbtack holes.
Step Five
Let dry for recommended amount of time on spackling product.
—
Are you a pro with tips of your own? Contact us here
to share your knowledge or comment below.
Do you have questions about your home improvement project? Connect with us here
or comment below to receive help from one of our pros.
Photo Credit: Kalan